Documentation - glideFares Travel Platform
Setting up a markup - B2C White Label Travel Portal
Home » Documentations » B2C White Label Travel Portal » Setting up a markup
Easy markup management - Setup a markup on each module bifurcatedly in percentage or flat
- Add a seperate convenience fee apart from markup
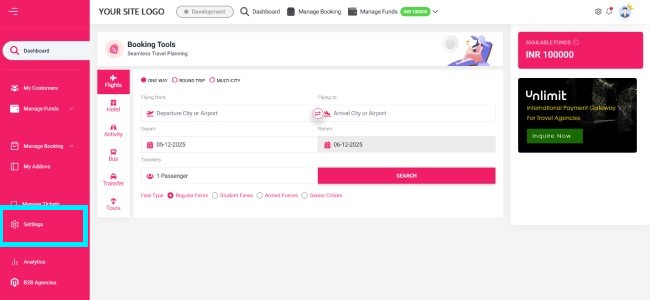
1. Login to your back office and navigate to Settings.
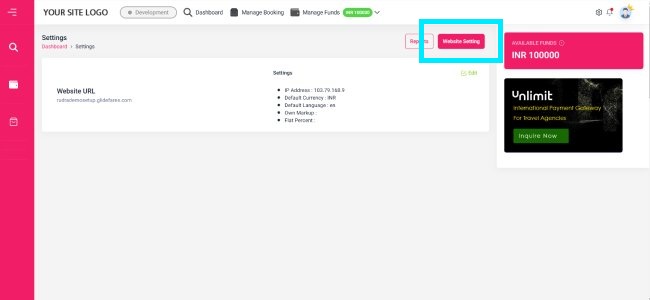
2. Then click on Website Setting.
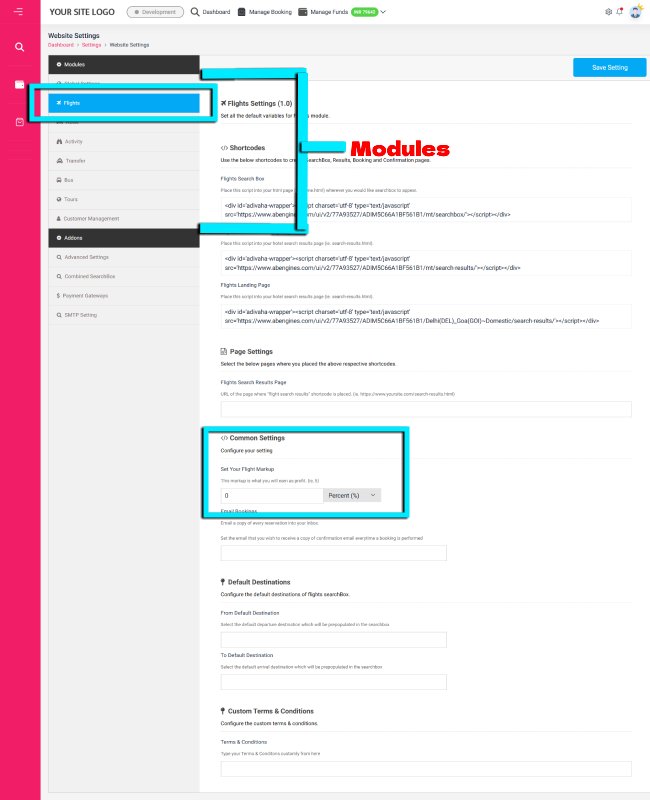
3. Click any module in the left panel to setup a markup. In this example, we will setup a markup in Flights module.
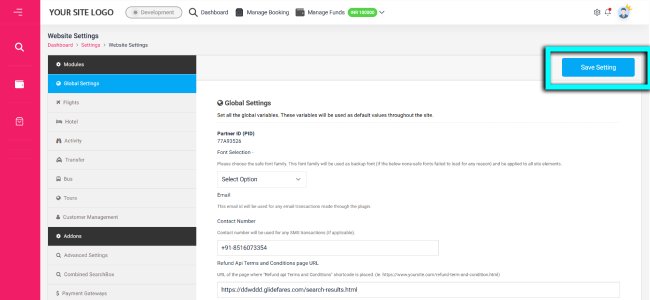
3. Click Save Setting
- Setup & Installation
- glideFares Travel Platform
- How It Works
- WordPress Plugin
- White Label Portal
- Cross-Platform Widgets/SDK
- B2B Travel Platform
- Mobile APP Builder
- APP Store
- Manage Wallet
- Load Funds
- Transaction History
- Back Office
- Global Settings
- Change Password
- Upload your logo
- My Bookings / Cancel Bookings
- Manage Profile
- Setting a Markup
- Customize Searchbox
- Custom Styling (CSS)
- Payment Gateway
- SMTP Settings
- Settings
- B2B
- Agency Registration
- Agency Account Activation
- Manage Agency Wallet
- Addons
- SMS Notifications
- Whatsapp Notifications
- Chatbot Settings
- Multicurrency
- Multilingual
- Travel Insurance
- Manage Cashback
- Manage Discount Coupons
- Meals & Baggages (SSR)
- Enable Taxation Module
- Photo Editor
- Geo Location based Currency
- Clubbed Flights
- Hide Passport
- Generate E-Ticket Manually
- Hold Bookings
- Many more ...